Time Lapse Camera
The project
The project is born from an idea of Michele G. The (first but not last) purpose is to take a time-lapse-shot of the traditional bonfire preparation (3-4 days) and burning (1-2 days).
For the purpose we needed something cheap, but powerful. There were many options, this is not the better, simply the one we used.
The system consists of a camera + a controller/timer circuit + power supply circuit.
If you use a Canon camera take a look at CHDK. Using this hack firmware you probably won't need building a timer/controller. We used a Nikon because was the only affordable and reperible at the time.
You should then take the camera apart and see how the switch works, and take some wires out of it. In our case the switch connects the signal wire to the ground so the interface to the controller-timer was very simple to make. In other cases may be more complex.
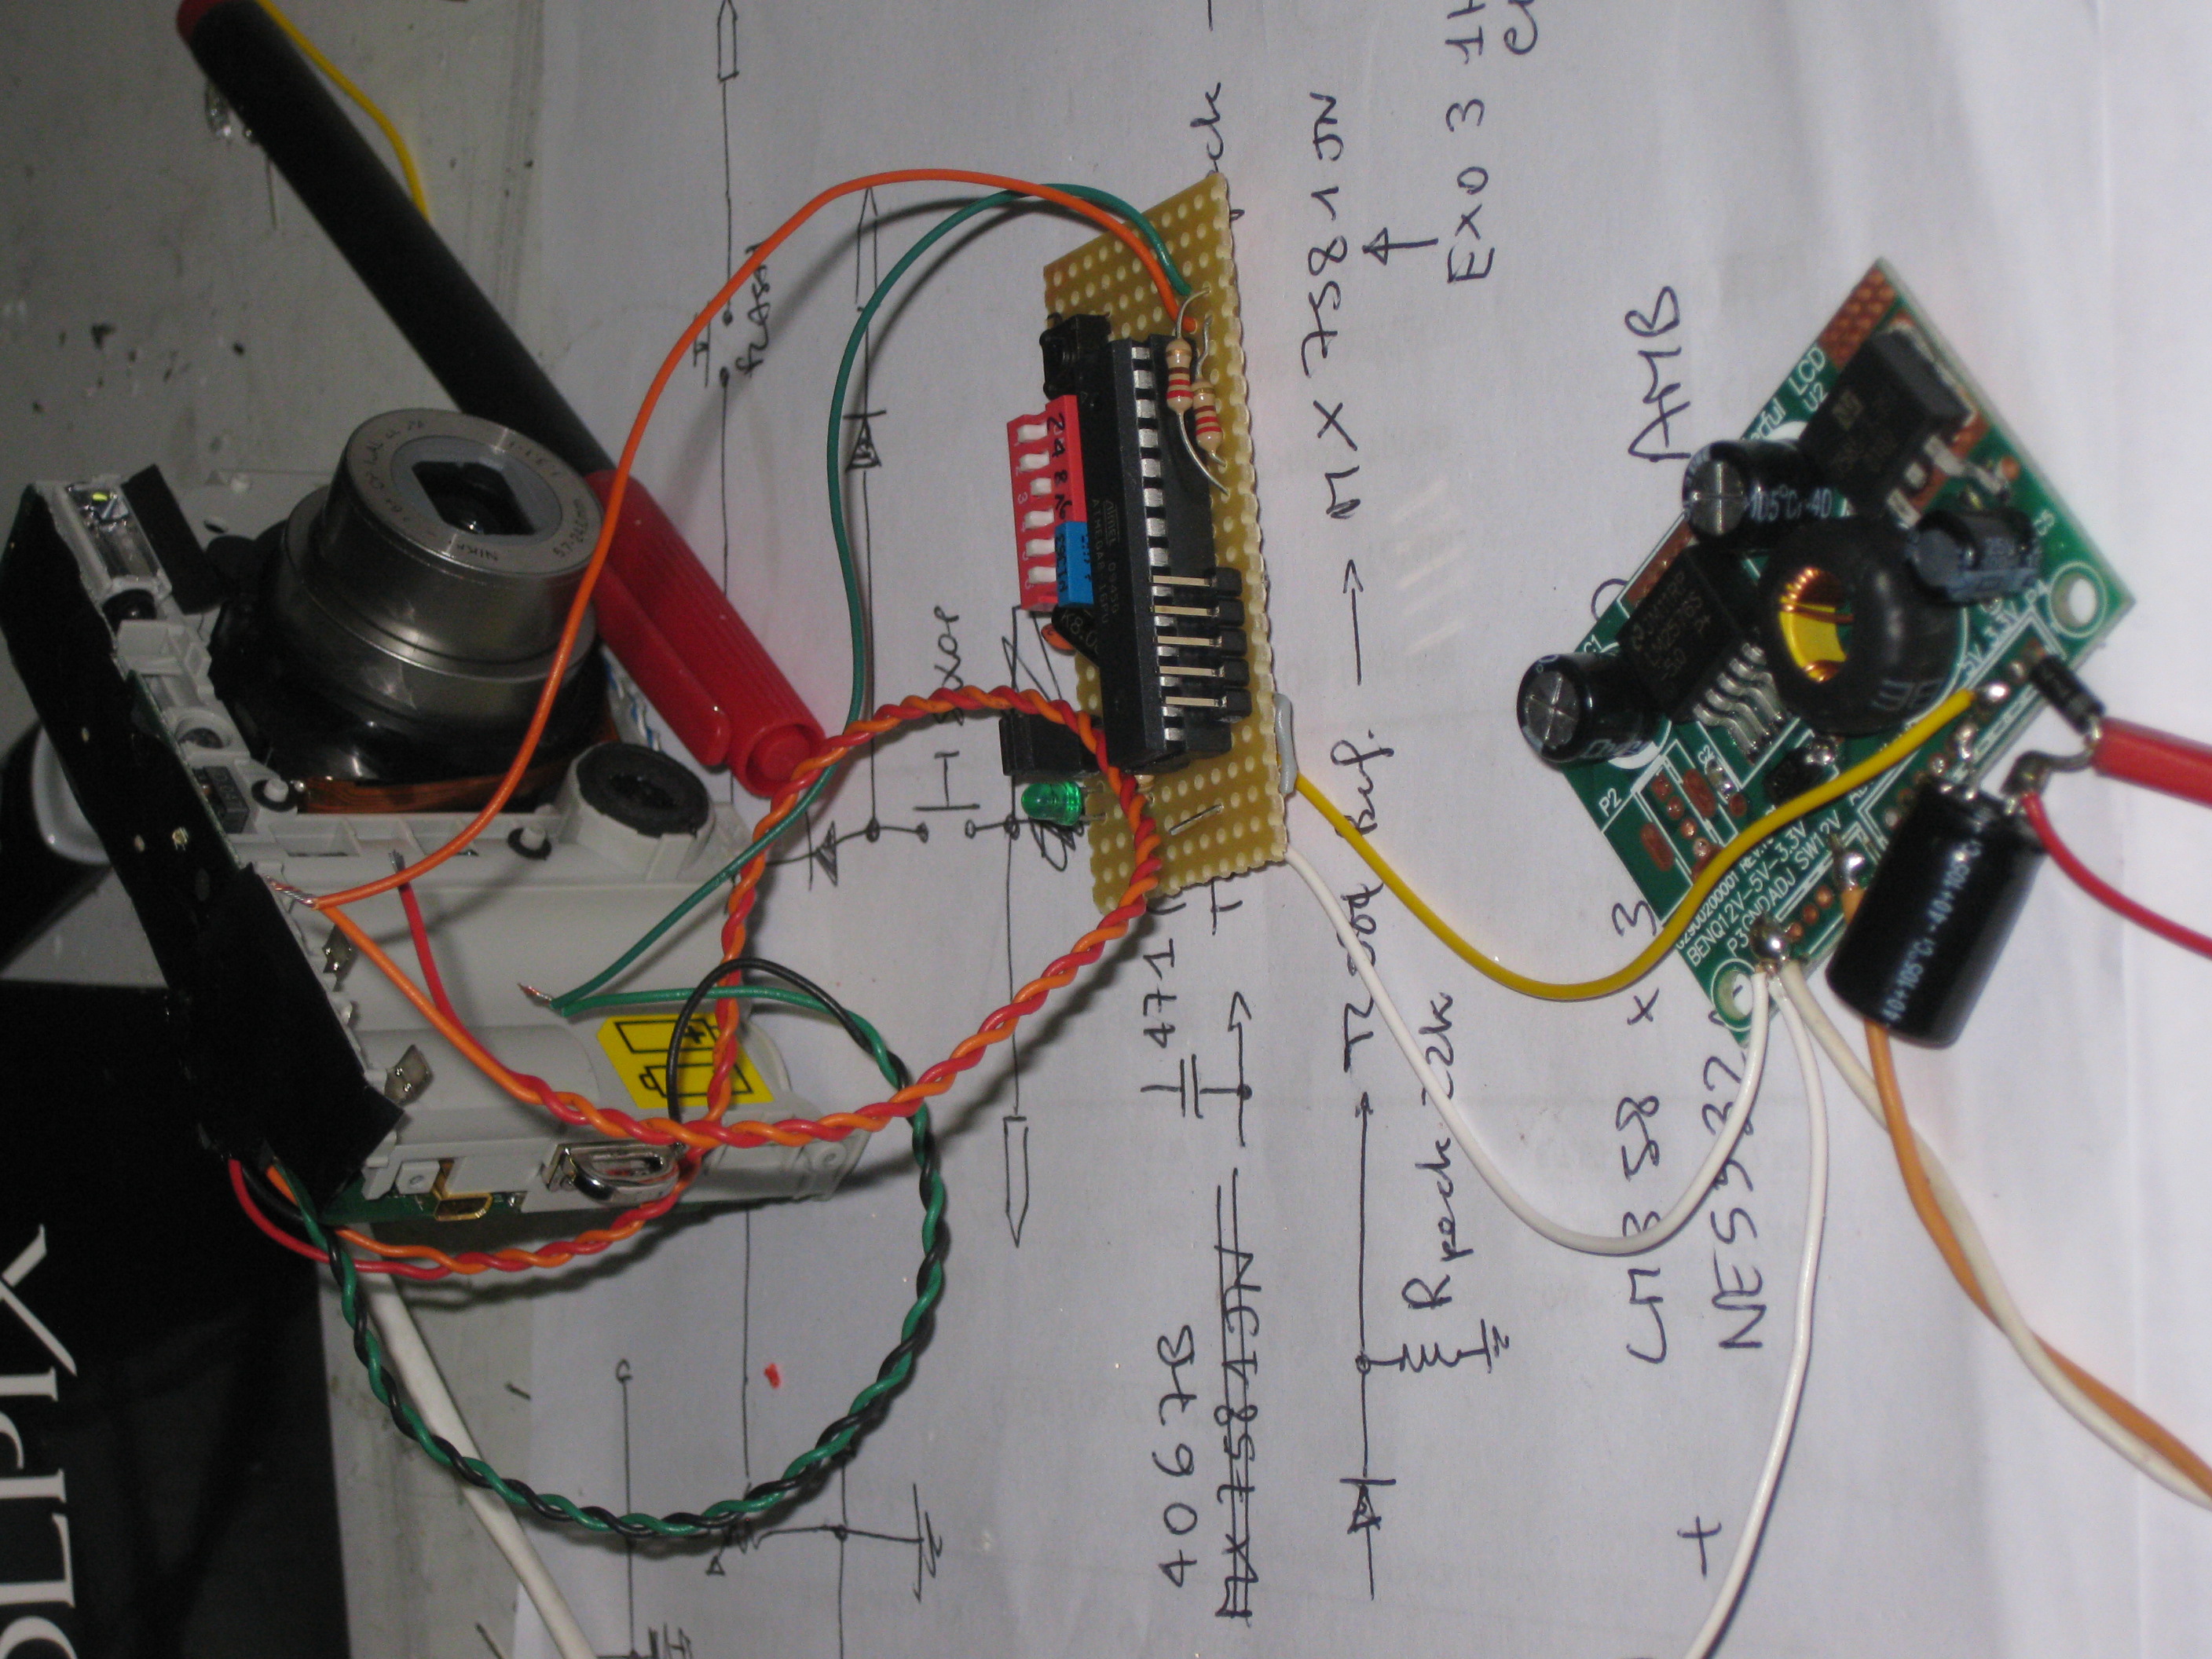
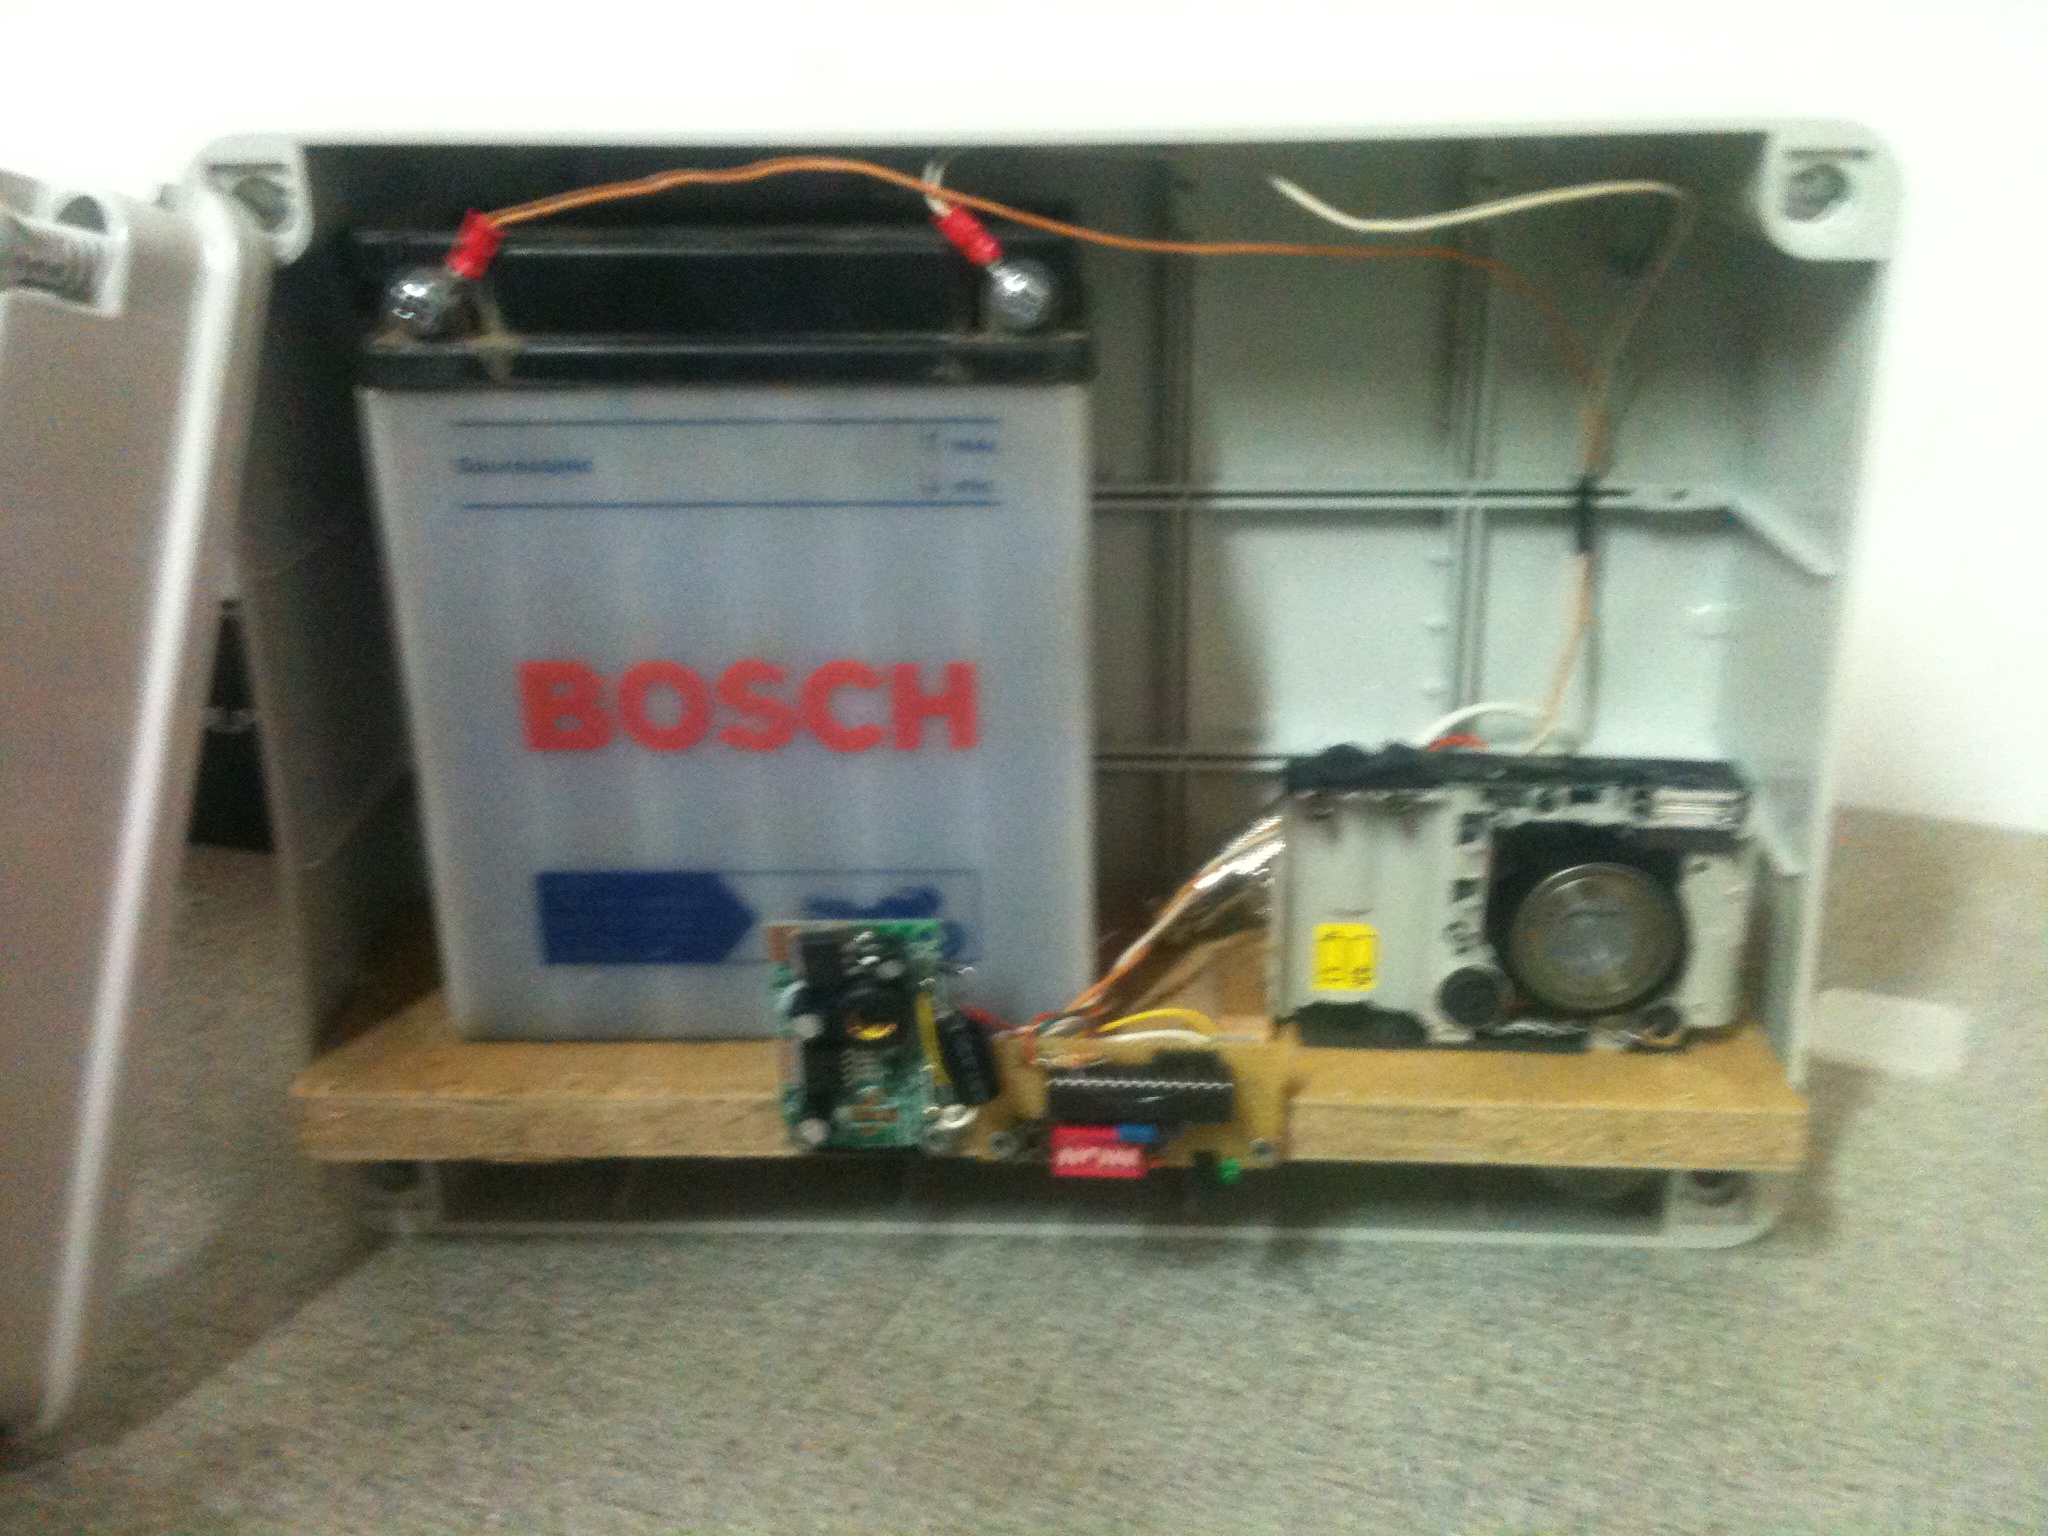
The whole system, under testings, looks like this:
The controller
The simple controller goal is to take a photo at regular intervals.
It should trigger the autofocus switch first, and then the shutter switch to take the photo.
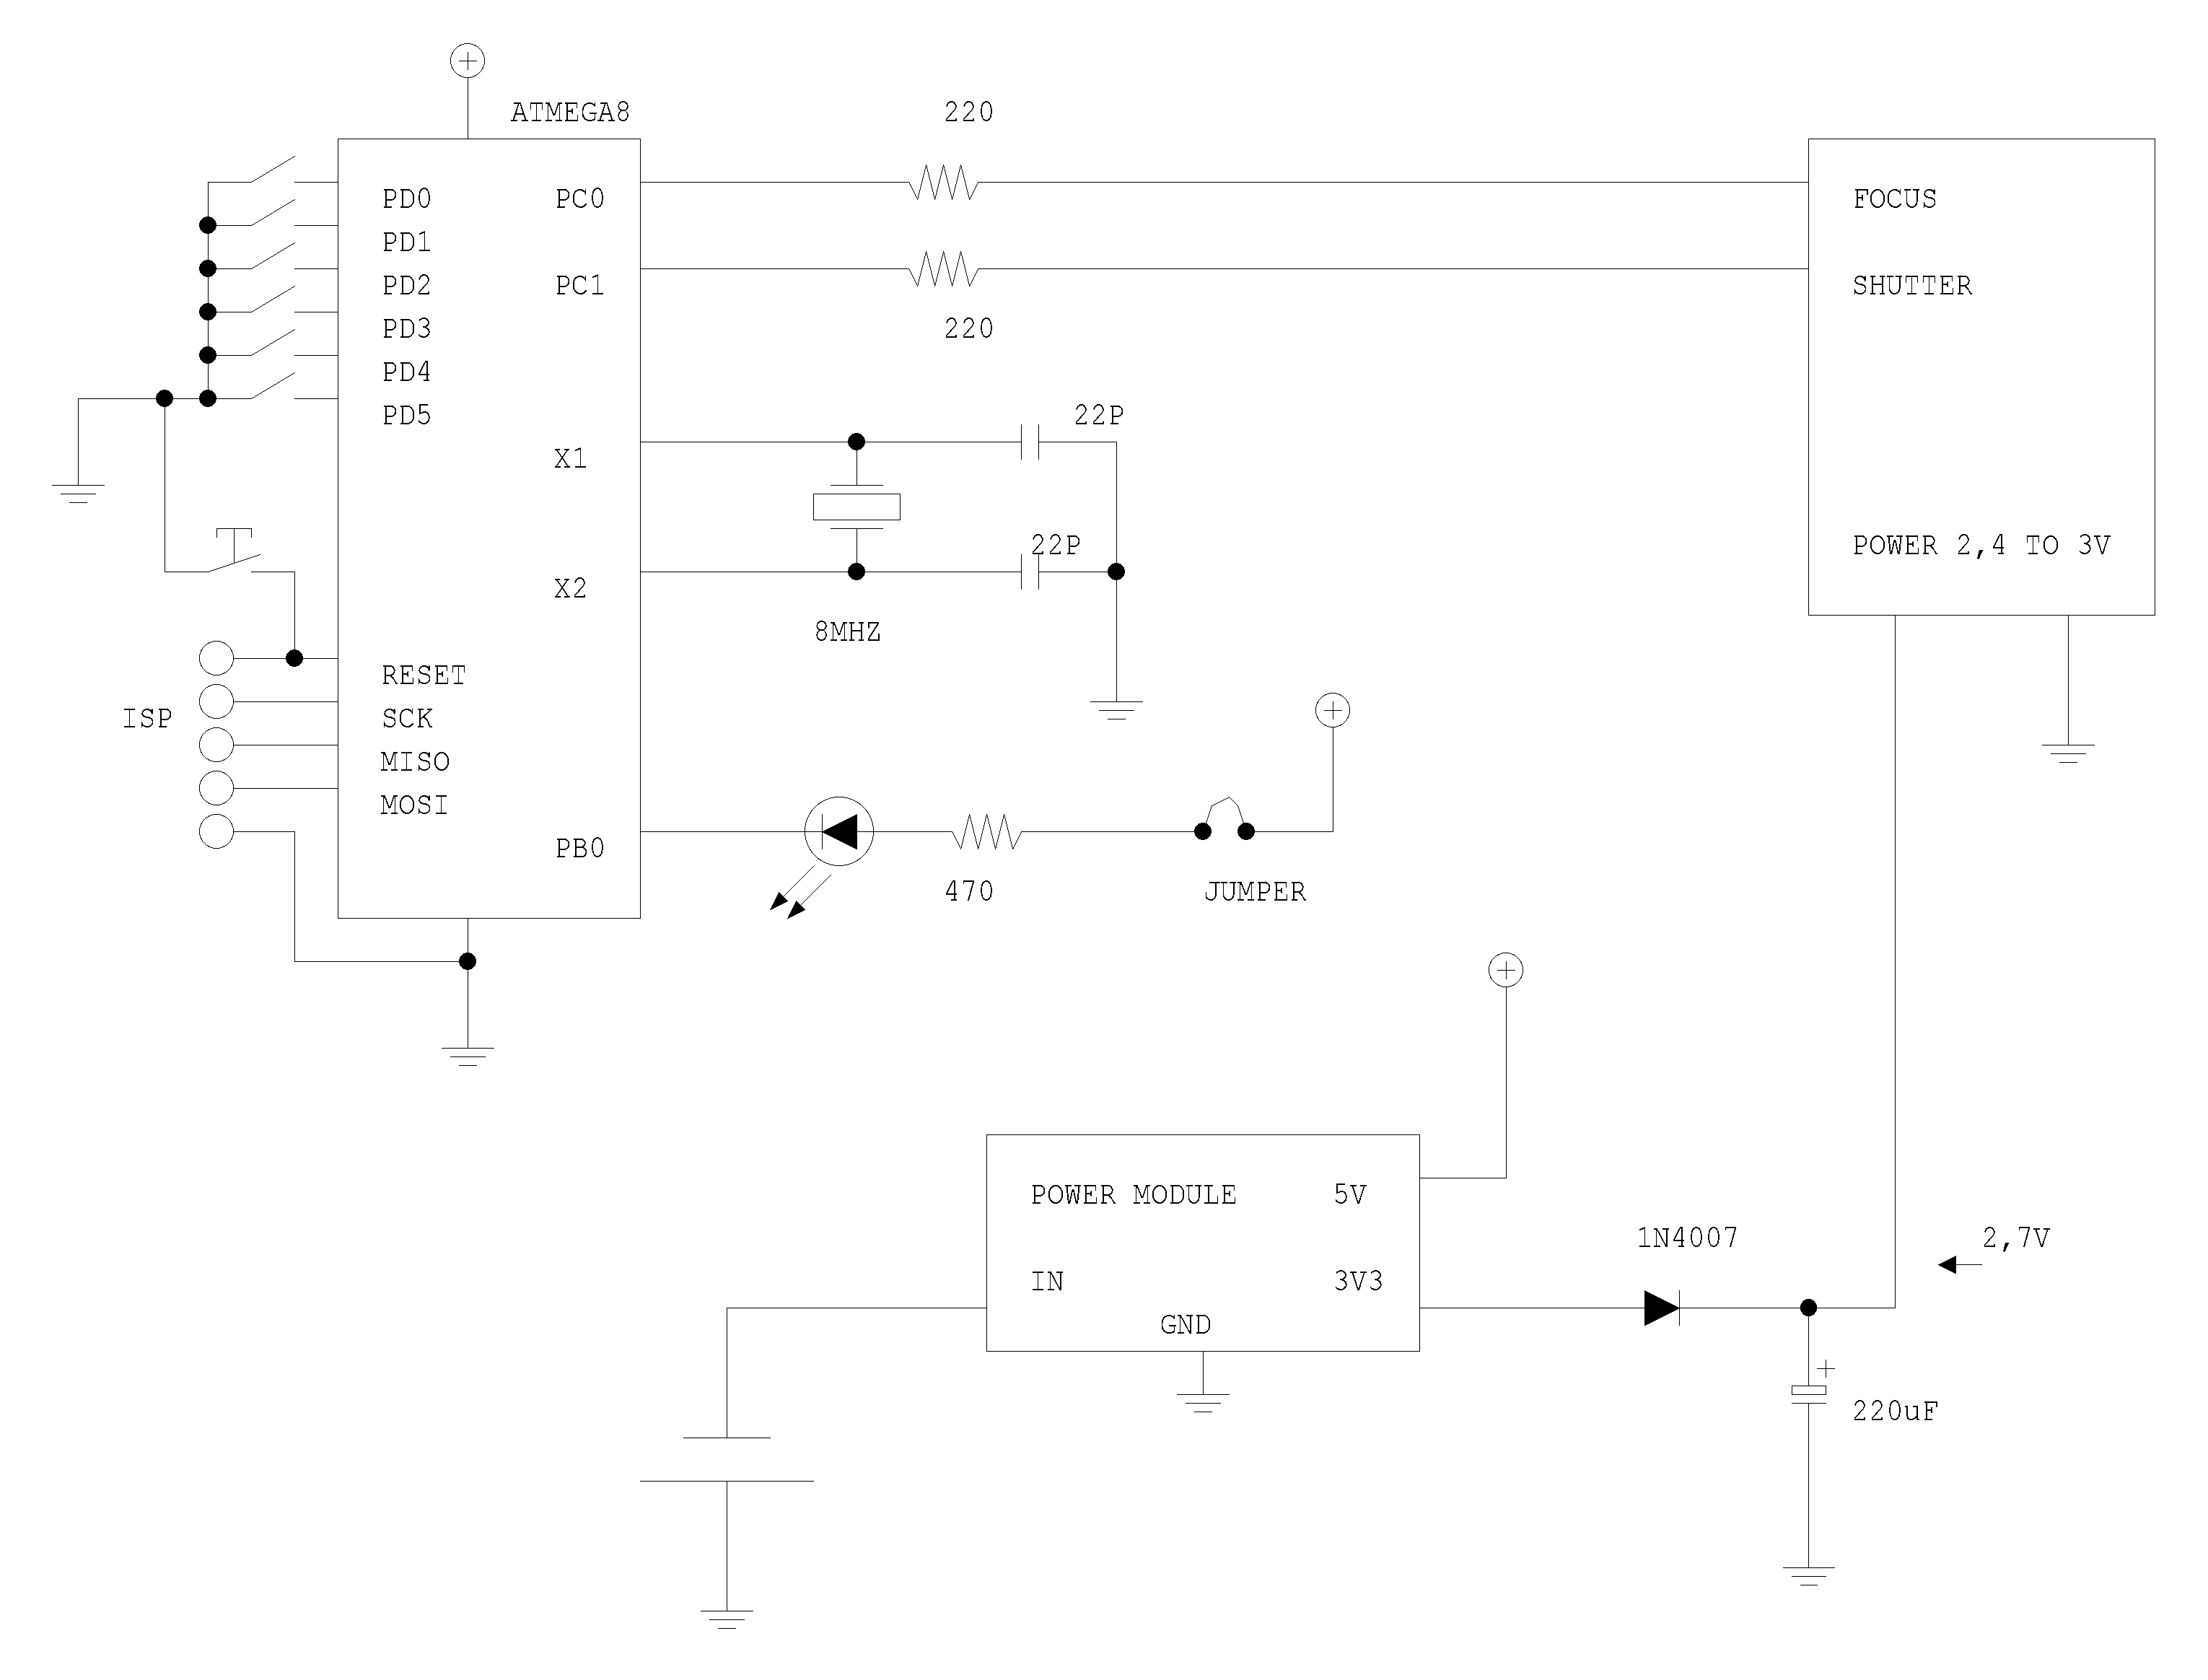
As mentioned above, the camera switch connects the wire to the ground, and there are two wires one for focusing one for the shot. The controller will have to do the same.
Hardware
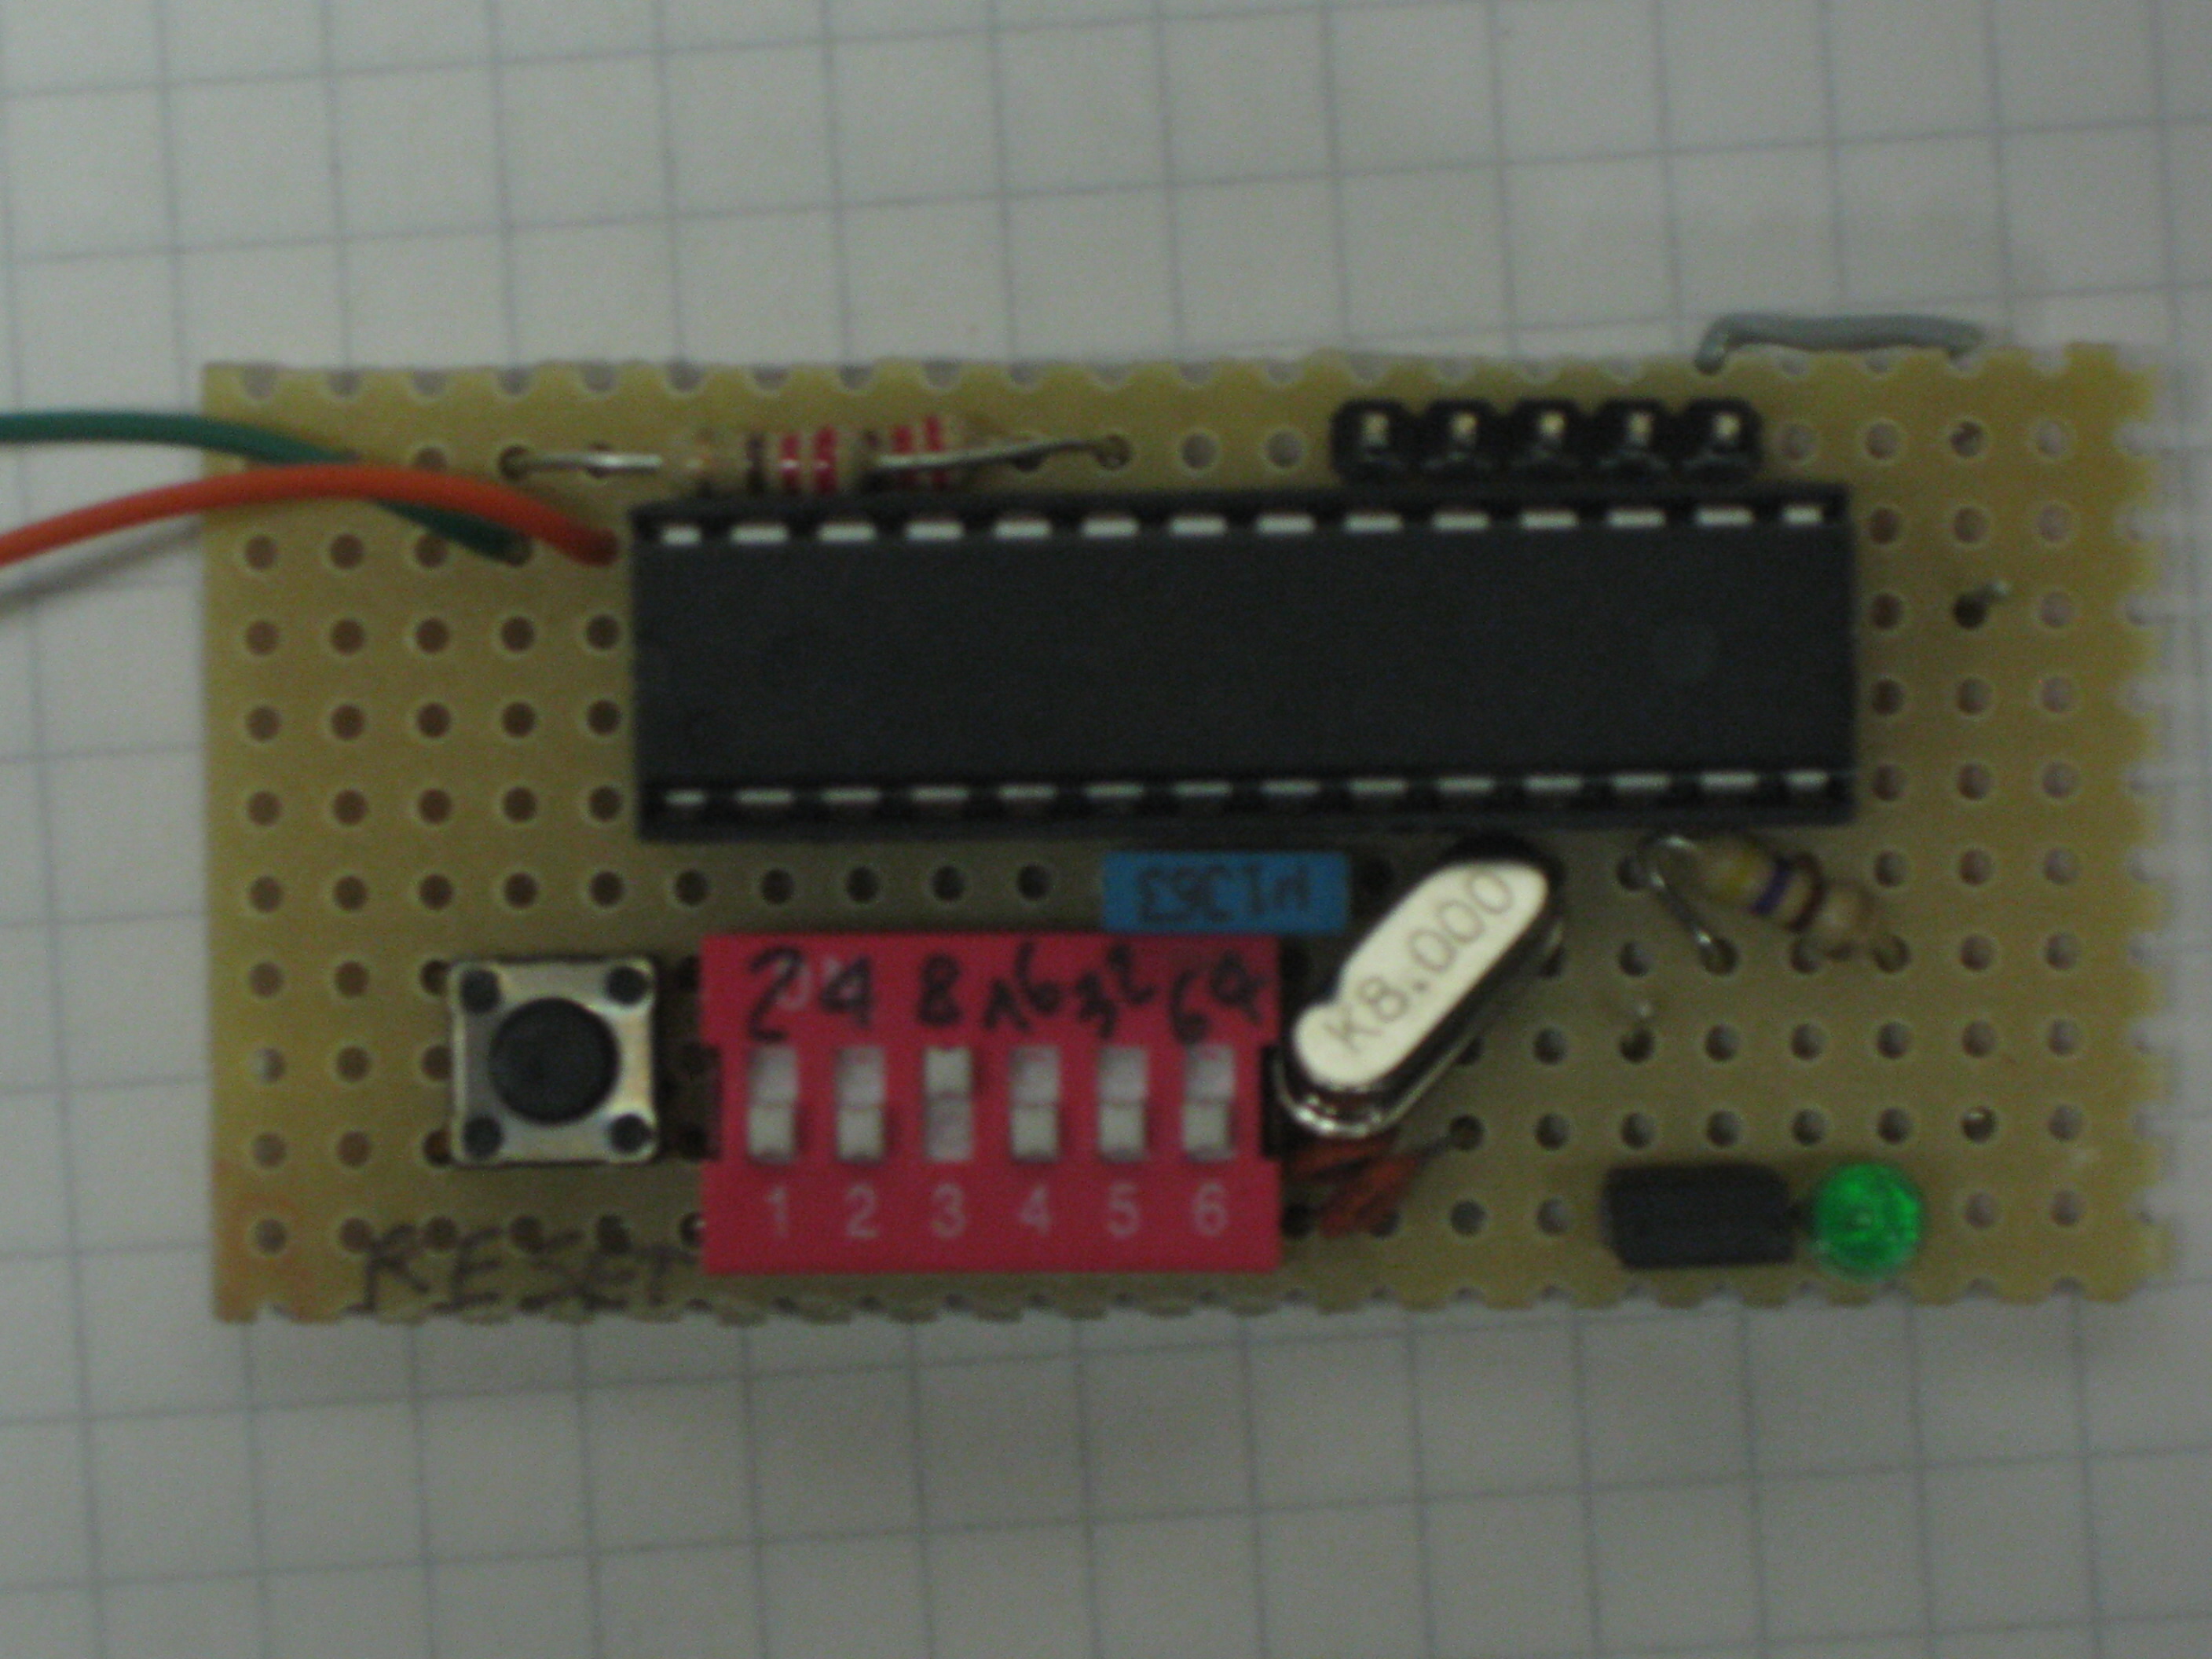
Issue #1: The timer. An atmega8 microcontroller (or any other) would be fine. Must draw the smallest current possible. The lapse-interval is set through six dip-switches with weight 2, 4, 8, 16, 32, 64 seconds. A led is for test purposes, it may be disabled removing a jumper. 8 Mhz quartz is optional, actually the internal oscillator would have been enough.
Issue #2: Power. I've used a pre-built module (see photo at top of page) that converts 9-12V into 5V through an LM2576 based switching step-down converter, and a 7585-3.3 linear regulator that provides 3.3v. An additional diode provides about 0.6v drop, so the camera is powered at about 2.7v. Other cameras may need different power requirements.
The system is intended to be powered with a 12V lead-acid battery. By theorical analisys, current drawn from the 12V battery should be about 0.5 times the current drawn by the camera. Experimental results are an average camera current of about 440mA, and a battery-drawn current of about 300mA. With this data 7Ah battery (like ups' ones) would last 23 hrs (less than a day).
Possible alternatives:
- 6V battery directly connected to 3v3 regulator (and microcontroller powered by 3v3 instead of 5v). The big drop of 2.7V means lower efficiency and worse performance.
- Other kind of power converter, like a switching 6V (or 12V) directly to the 2.7-3V needed by the camera. Surely better performance, but by now I don't feel like building this.
Software
Simple C-written code provides timer routine. Features:
- A photo must be taken every N seconds. You select N in the range of 4 to 126 seconds.
- The interval set over the dip-switches is read only at startup (reset) to avoid current dissipation on the pull-up resistors.
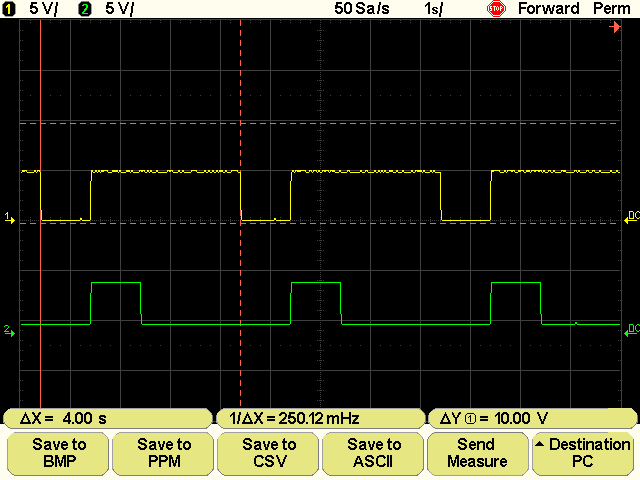
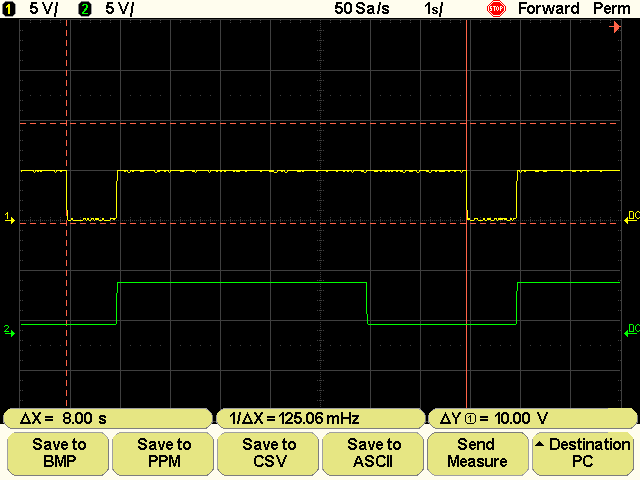
- The focus signal is first driven low, then after 2 seconds the shutter signal is driven low, another second and both are released to hi-z state.
- An optional led shows when the photo is being taken (lits up when focusing, turns down a second after the shot).
Source can be found here: http://www.maetech.it/docs/proj/lapsetimer/main.c
The images below show the working timer. (green trace is focus, active low; yellow trace is shutter, active low)
First Setup
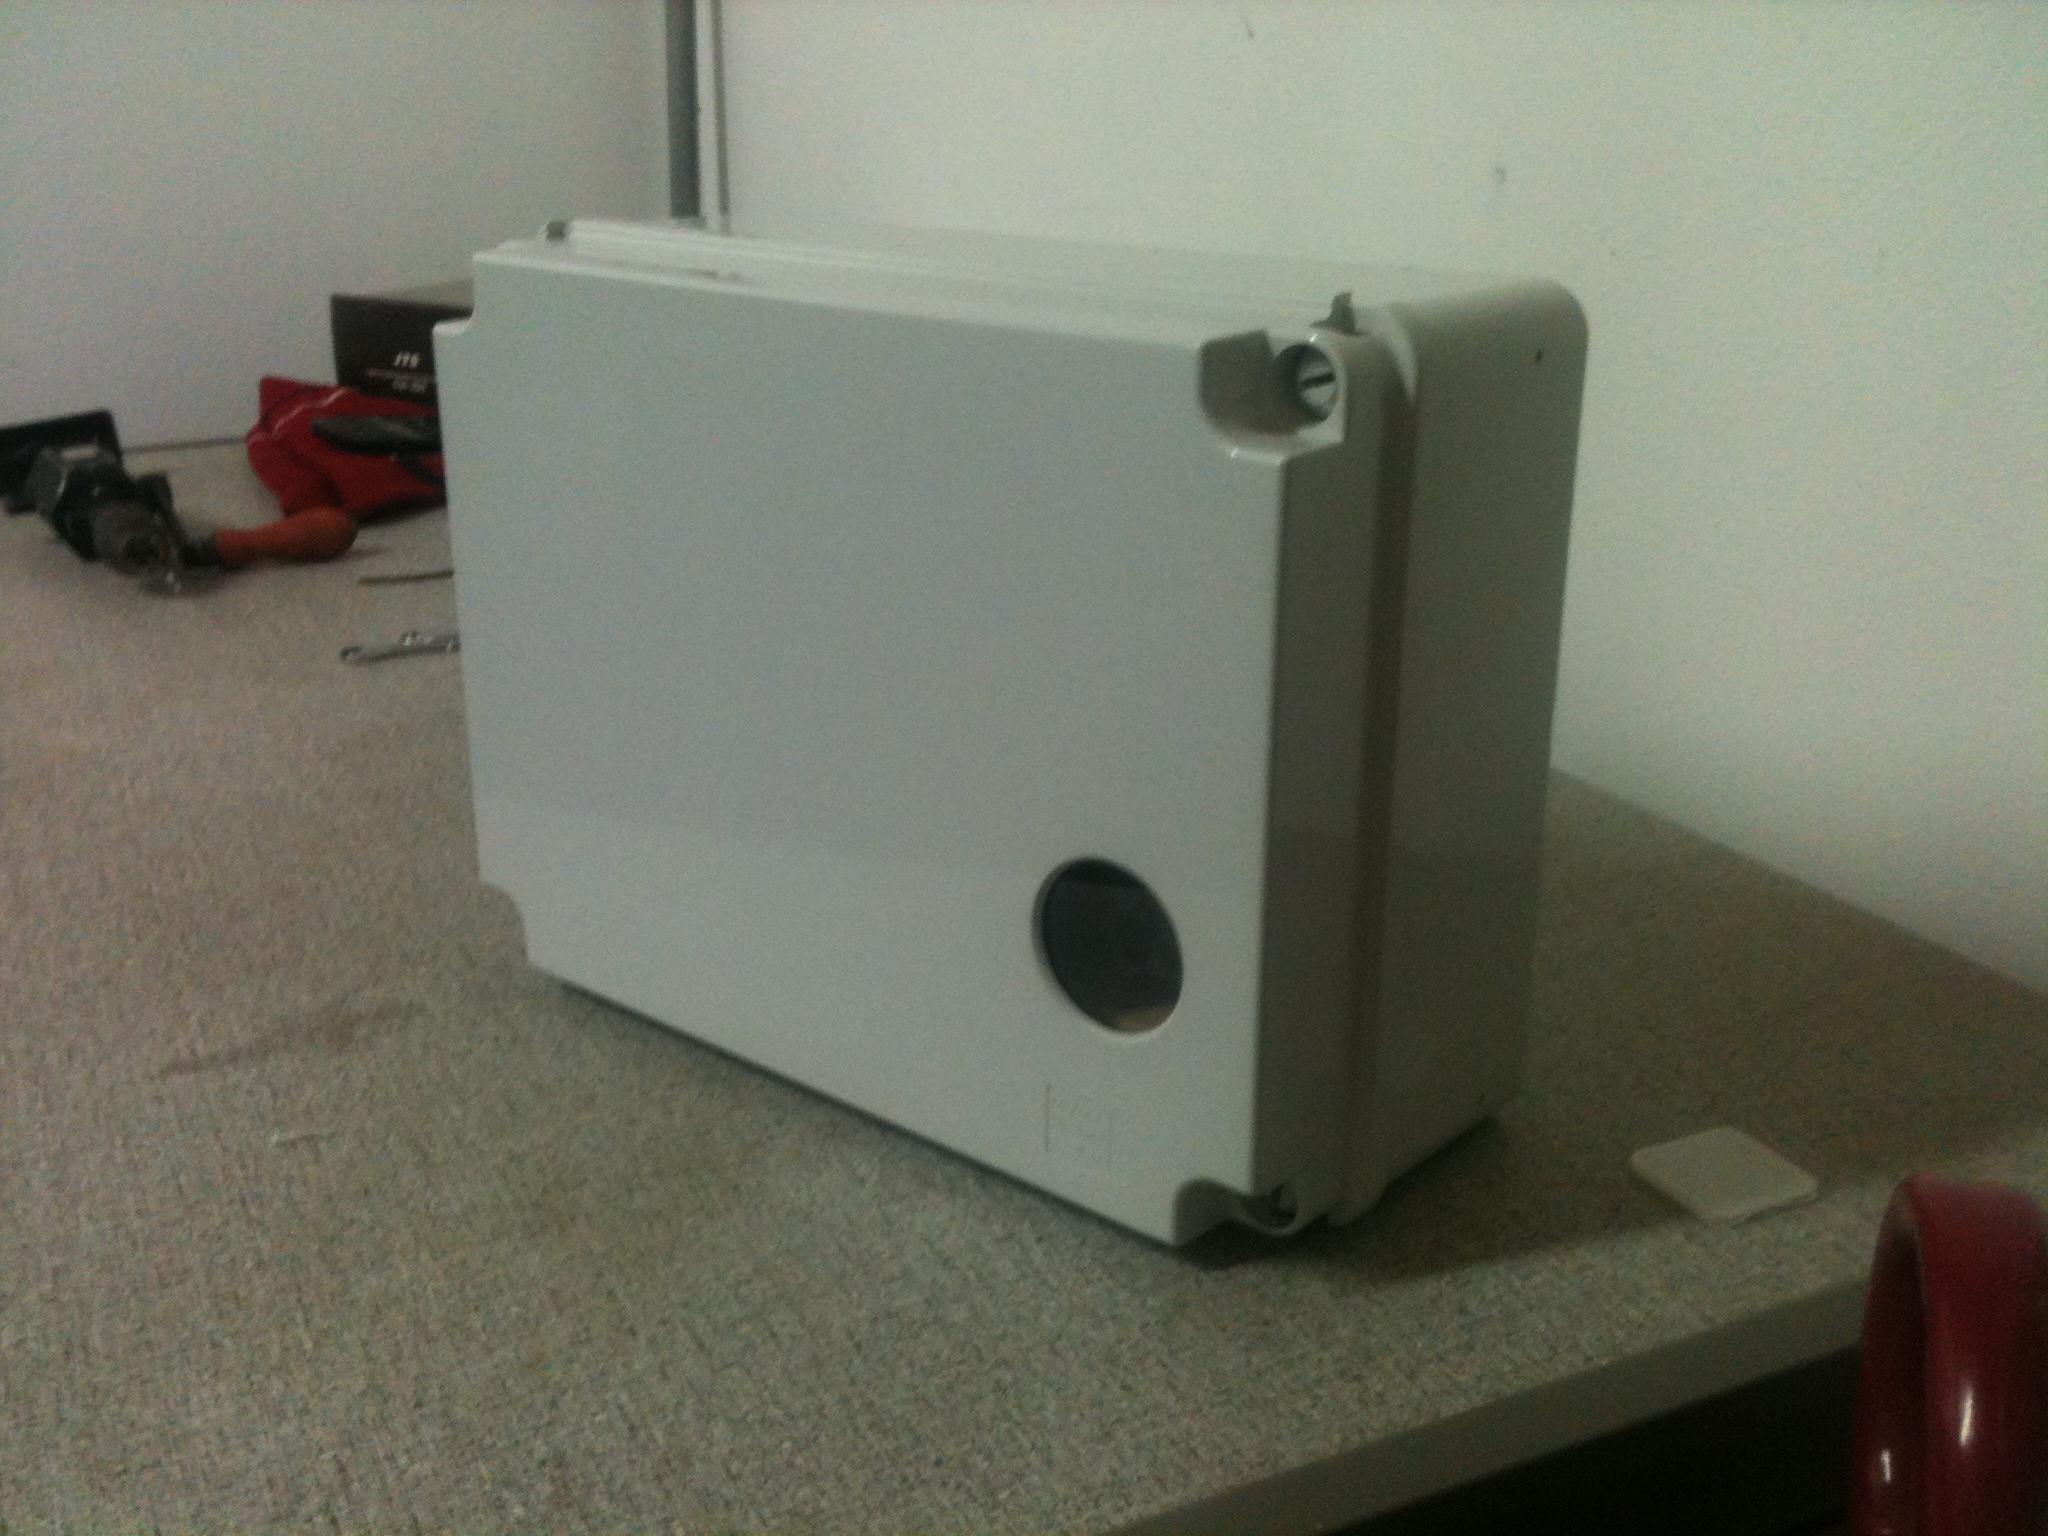
The whole system has been enclosed in a plastic box. There is a hole for the camera lens, protected by a transparent plastic shield, fixed with glue.
You can see a lead-acid battery in the box, lately it has been detached and put outside the box, and linked with a panel-mount connector.
The first, experimental, usage of this system was capturing the making of the Traditional Bonfire in our town.
The box and battery have been placed on the roof of an electric power distribution room, 20-30 meters far from the scene.
You should keep in mind the following matters when positioning the camera:
- You should check with the camera display or in other way how the photo are taken from the point of view you choose
- Imagine where the sun will be at each moment, it could enhance or blind your photos
- Take care of marking down the positioning, or better fix it in a way that it could be detached and placed again in the same position it was before
Make the best adjustments on the camera, automatic would be fine. Decide the size of the photos, we've used 1024×768. Calculate how long the camera will work in standalone, basing on SD card capacity and battery capacity. After that period you have to change battery and/or SD card.
First Video
Over 10 thousands photos have been shooted, of which only 4 hundreds have been used to make the video. A selection and proper ordering is a must.
The video have been made using VirtualDub for Winzoz, other tools can be used (maybe also opensource).
Here it is:
Note this is first version of video, some photos have to be deleted, other have to be inserted.
